You’ve got a ladder, you’ve got a staircase, and you’ve got a high spot to reach. Maybe you’re planning on using that ladder for painting on stairs, hanging up a portrait, or doing some HVAC work on stairs. But the fact of the matter is, using a ladder on stairs is no easy feat. At least, not at first glance.
Read on, and we’ll walk you through key elements to consider and answer how to put a ladder on stairs.
Haven’t picked out the right ladder to use on stairs yet? Check out our previous blog post, where we go over popular styles of ladders for stairways and discuss what ladder duty ratings actually mean.
It may seem like there’s a straightforward solution to using ladders on stairs. Prop it on a box, lean it against a wall, and get to climbing, right?
Not exactly. Let’s work our way through each step of the above sentence and point out the errors, beginning with the box.
A Stable Surface
While single ladders, extension ladders, and (in certain configurations) combination ladders are of the few ladders that are not bound by regulation against the use of stabilizers and levelers to create a level surface for your ladder, the quality of the surface matters.
For starters, the leveling tool can’t be as unstable as a standalone box, barrel, or crate – ladder accessories must be mounted directly on your ladder to ensure stability. Other leveling tools that don’t fall under the umbrella of “accessory” don’t necessarily need to be mounted to a ladder, but they should come with their own self-supporting capabilities that can withstand slip tests.
Only, it’s not just a matter of stability. Gluing a plastic box to the feet of your ladder won’t exactly cut it. You need to ensure that the accessory or tool you’re using can:
- Support the weight of the ladder
- Support the weight of the person using the ladder
- Support the weight of the equipment used by said person on the ladder
- Support the weight of tools being carried, stored, and used by the equipment-laden person on the ladder
Otherwise, the stability and levelness of your leveling tool is a moot point if your ladder breaks right through it. Your leveling tool or accessory should be capable of supporting at least 4x the duty rating of your ladder and preferably be made of steel.
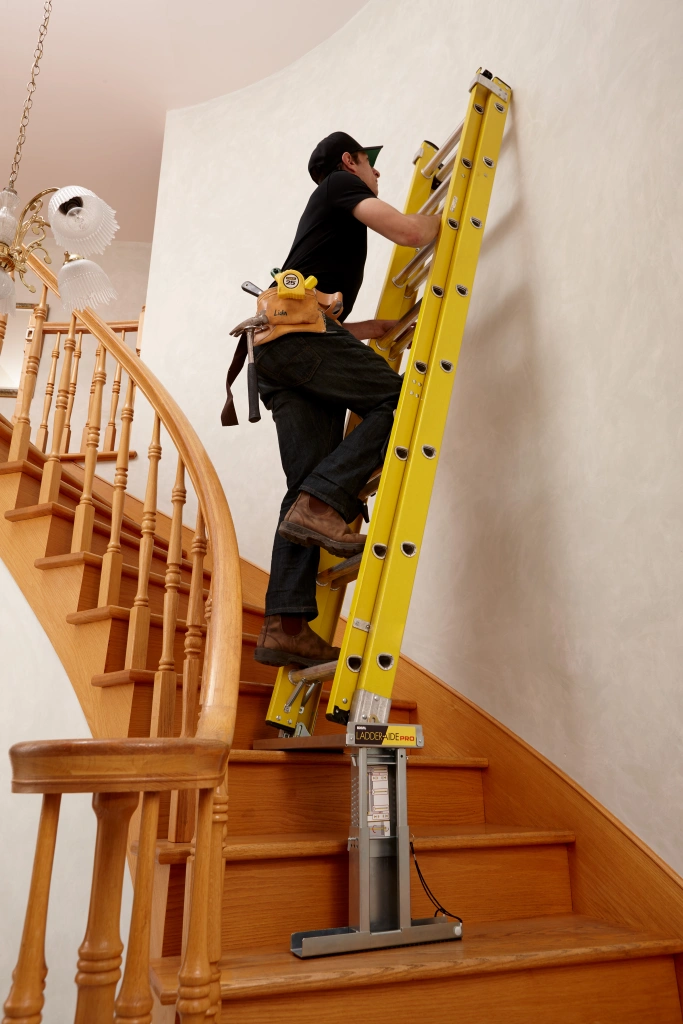
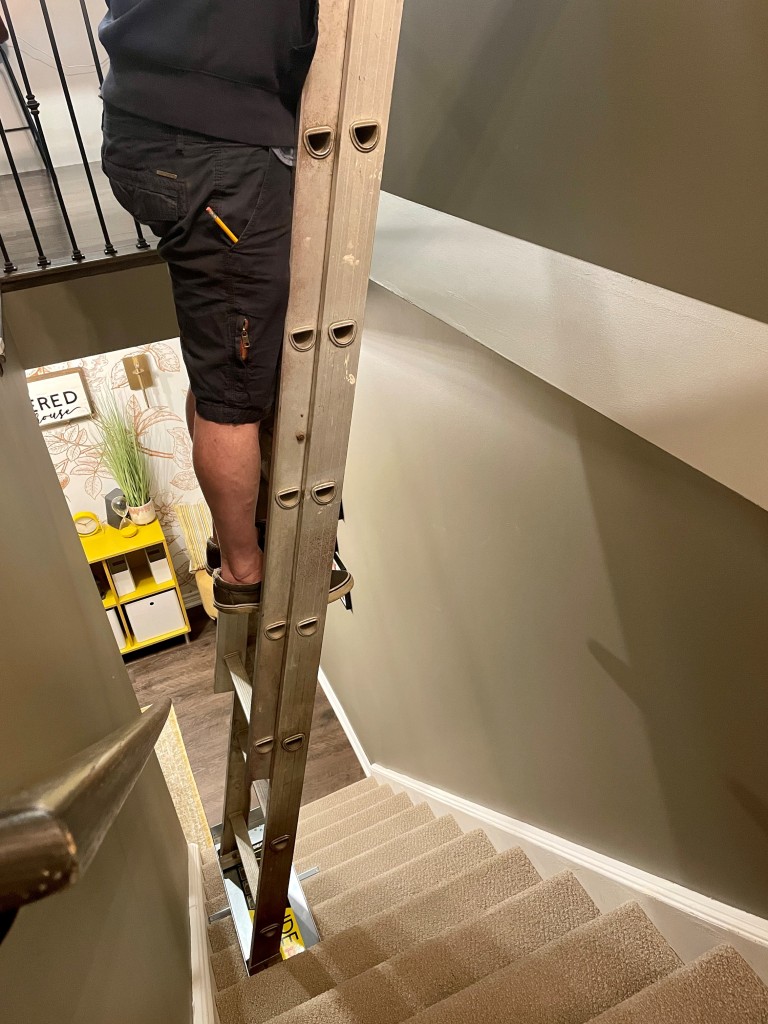
If you’re looking for a ladder leveler for stairs, then look no further than the Ladder-Aide PRO. This all-steel ladder tool can support up to 1500lbs, is micro-adjustable to 1/8″ increments, and is built to accommodate North American stair standards.
The 1 In 4
So if you’ve got a stabilizing tool for your ladder that is both stable and capable of supporting the weight of you and your ladder, we’re now ready to address the next error of that initial sentence: “lean it against a wall”.
Although the heart of that line’s in the right place (you absolutely should lean your ladder against a wall or flat, stable surface), there’s a bit more to math out. Specifically, you need to consider the angle of your ladder placement, the height of your ladder, and the width and step height of the stairs you’re working on.
The acceptable angle for a ladder to be at, relative to the surface it’s placed against, is 75° (specifically 75.5°), also known as the 1 in 4 rule. The name’s not just for ease of remembering – it’s a quick guide to reaching that perfect angle. Simply move the ladder 1 foot away from a wall for every 4 feet of ladder height.
The reason why your ladder should be angled at 75° is that this strikes the perfect point between wall contact, floor and ladder foot contact, and weight distribution between the wall and floor to support the ladder and the person using it.
Moving your ladder closer to a wall would lessen the surface area between the wall and ladder and reduce optimal weight distribution, making it more likely to sway side to side. In contrast, moving your ladder away from a wall would minimize the point of contact between the rubber feet of your ladder and the ground. This might cause the ladder to drop, and may result in your stabilizer or leveler also slipping and giving out.
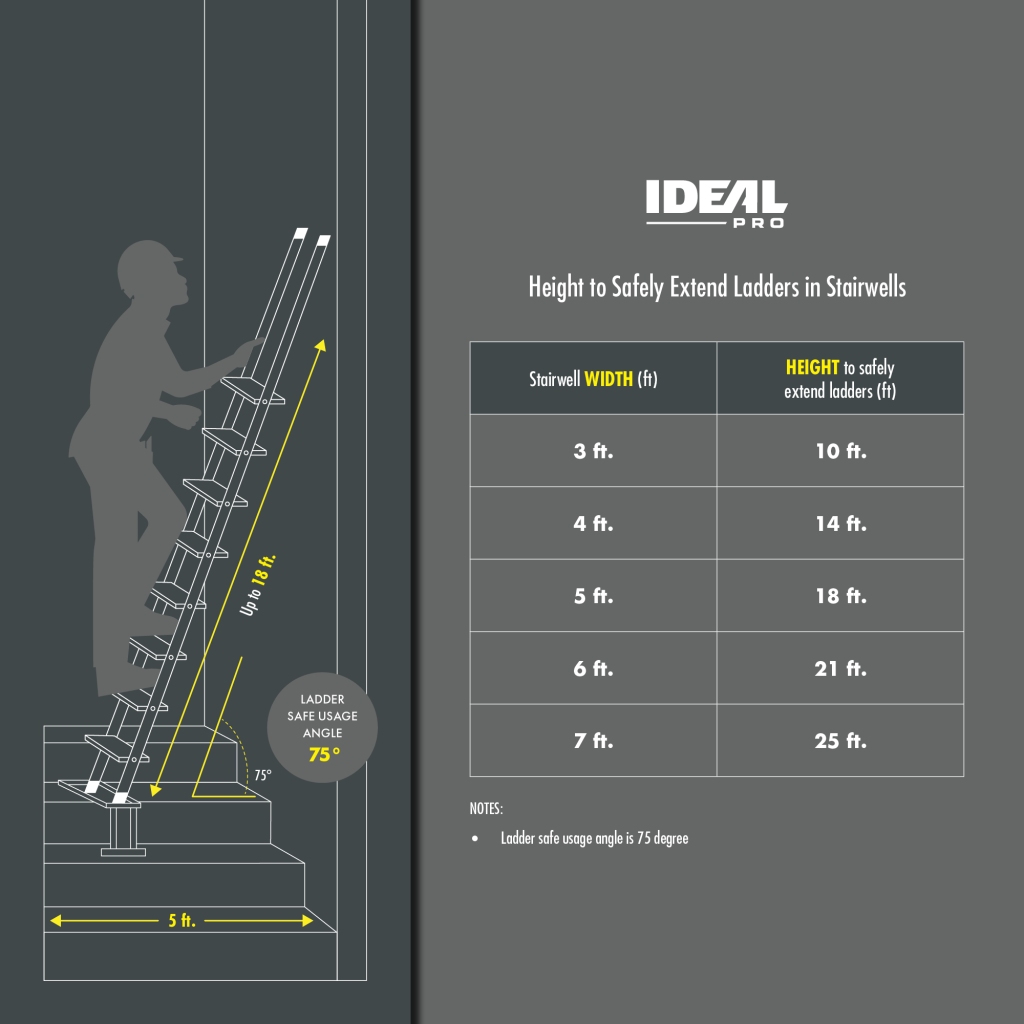
Let’s loop back around to the 1 in 4 rule. The higher your ladder, the farther away your ladder needs to be. This poses a problem on stairs, as you’re going to eventually run out of real estate if you’re painting a particularly high corner.
Unfortunately, this problem isn’t as easily addressed. The ladder stabilizing tool you use may or may not provide some leeway, but if you’re looking to maintain that steady and stable 75° angle and you’ve run out of room to use your ladder on stairs, you may need to look to alternative solutions, such as scaffolding.
Climbing Tips and Tricks
I’ll get on my soapbox about the dangers of scaffolding later. For now, we’ve a third part of the equation to consider: “get to climbing”.
I won’t lie, there’s not a whole lot to go over with this one. If you’re willing to use a ladder on a staircase, you’ve probably used a ladder elsewhere, and many of the same principles apply on stairs as they do off them.
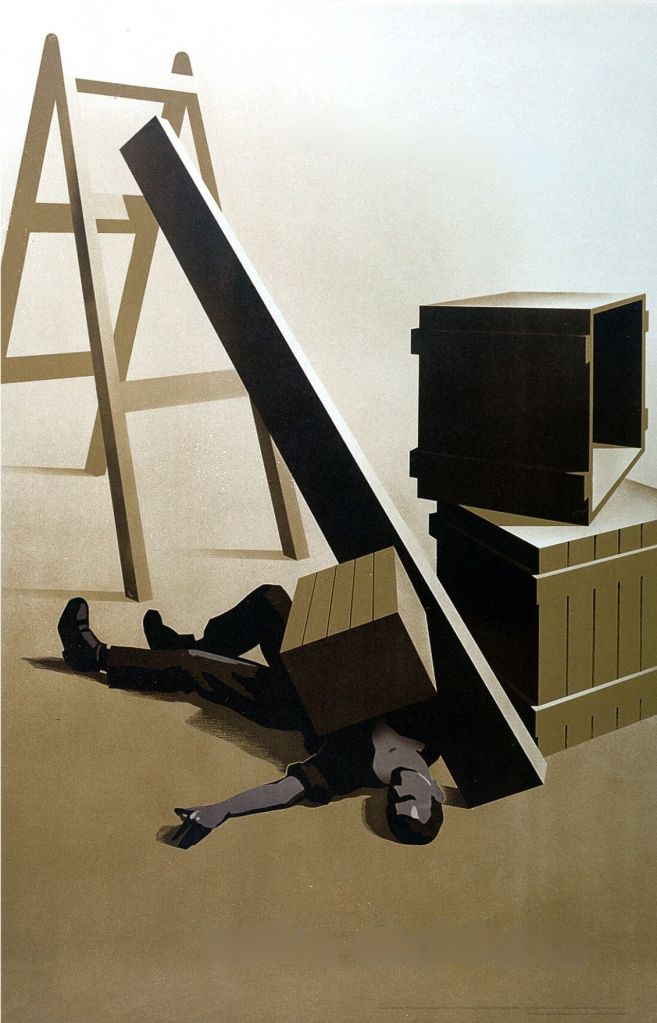
Most importantly, don’t lean far to the side from the body of the ladder, keep in mind the 1 in 4 rule, and at the very least, wear a hard hat. If you’re keen on taking the quick way down, you can at least try to minimize the damage.
If you’re a true stickler for safety (something to be commended, applauded, and encouraged), you’ll abide by OSHA’s recommendations of ladder fall protection systems. While these recommendations are intended for fixed ladders, or ladders that are permanently built into a structure, OSHA guidelines do provide some key universal takeaways.
Though not as applicable to stairwells, if you find yourself propping your ladder to access an upper landing surface (maybe you have the ladder propped against the upper floor stair railings instead of a wall), the side rails should extend at least 3 feet above the upper landing surface. This is both to provide added stability and provide an easier means of egress.
Additionally, make sure the ladder you’re using is capable of supporting at least 4x the maximum intended load. Granted, we don’t want you testing that out yourselves; this is more of a manufacturer requirement, and something worth following up on as a consumer. The same notion applies to any ladder accessories and tools you use.
Apart from that, stick to going one rung at a time. Take it slow, take it steady, and do not invoke hubris. The moment you feel shaky, step off to safety. If you’re not acquainted with using a ladder on stairs, and if your setup doesn’t fill you with confidence, there’s no harm in working with professional contractors, either.
Whew. That was a lot of words, and a lot of reading. Still, this probably took less time than it would have taken to set up staircase scaffolding (did I mention I’m not a fan?).
Speaking of scaffolding, we’ve done a lot of talk about ladder levelers, ladder accessories, and ladder stabilizers. If you’re keen to learn more, check out our blog post about the various types of tools available to your disposal, including but not limited to the coveted ladder roof hooks.